Winter Management of the Lawn – Negative Factors That Can Occur in Winter

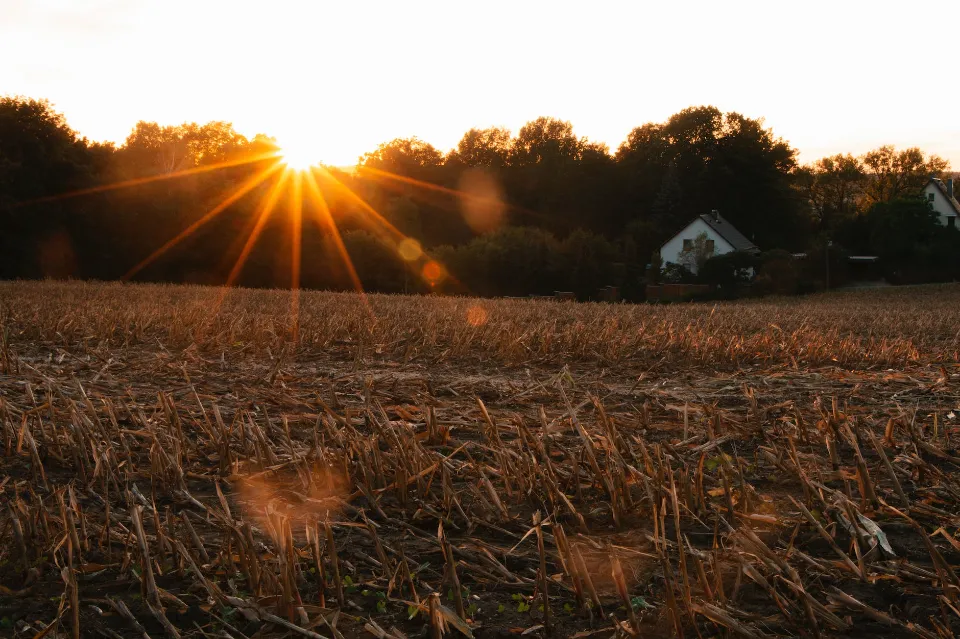
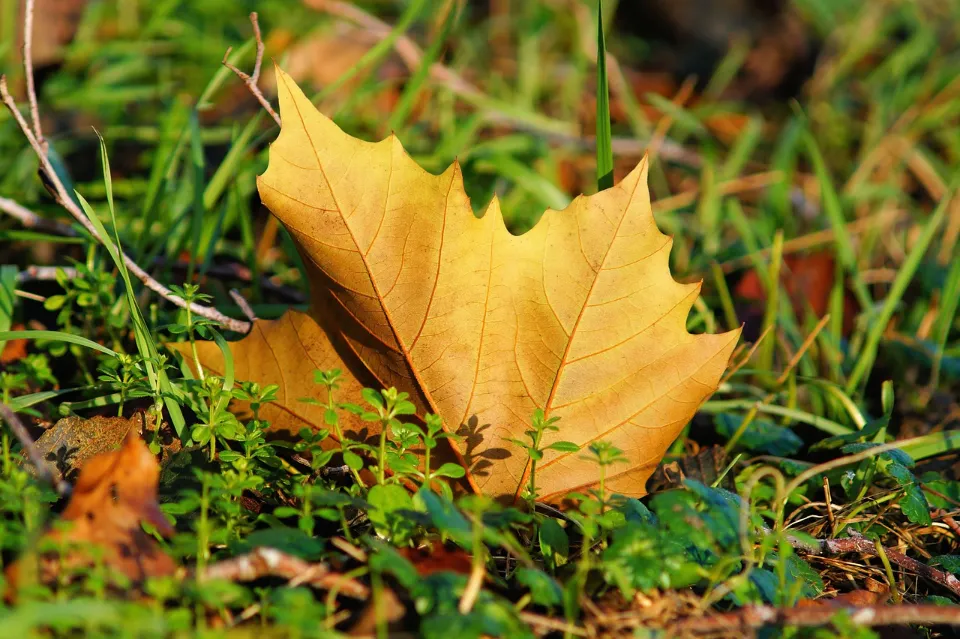
You may believe that winter lawn maintenance is not necessary because turf grass gradually enters the yellow phase from autumn to winter. In reality, winter lawn maintenance has a greater impact on enhancing the ornamental value of the lawn and the growth of the lawn the following year. As a result, targeted management of the lawn is also required in the winter, but compared to the previous three seasons, it is relatively straightforward and straightforward.

Management of Warm-season Lawns

Warm season turfgrass has entered the dormant period in winter, most of the aboveground parts have withered yellow, and the physiological activities of turfgrass have basically stopped. Therefore, there is no need to apply fertilizer, spray, etc. in winter, but other management measures such as pruning, weeding, etc. should be kept up, so as not to add difficulty to the management of the coming year.

Winter Management of the Lawn - Negative Factors That Can Occur in Winter

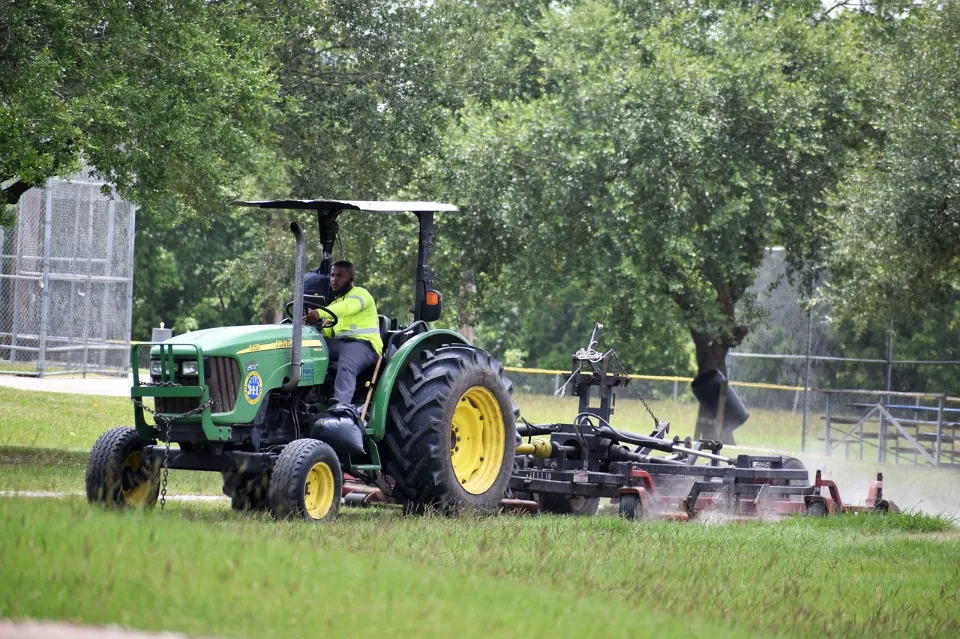
Remove the Dead Grass Layer

Warm-season lawn grass has a dead grass layer that is simple to accumulate and that is simple to turn into a habitat for central pests and diseases to overwinter. In this situation, it is possible to lessen the likelihood of pests and diseases in the following year by removing the dead grass layer with a special grass comb or a special iron rake. Furthermore, it is simpler to remove dead grass when enjoying a wintertime lawn.

Mulching

Uneven lawn surfaces will result in a number of challenges for lawn management and grass growth, including difficulty operating lawn equipment, decreased appearance quality, poor lawn growth, serious diseases and pests, etc. Therefore, it is more crucial to use the warm season lawn grass’ winter dormancy period to cover the soil, giving the lawn bed a tidy and lovely appearance, especially for the sports field lawn and fruit lawn.

Winter Management of the Lawn - Negative Factors That Can Occur in Winter

Watering

Warm-season turf grass is vulnerable to low temperature risks; if a soil drought occurs in winter, the soil temperature is easily lowered. At this time, it is necessary to raise the soil temperature by watering, as well as to provide enough water for the respiratory growth of turf grass, even though the water requirements of turf grass during the winter dormancy period are relatively low. In addition, if the soil temperature is too small, the root system of dormant lawn grass may lose water and die. Therefore, winter irrigation should be carried out before wintering of warm-season turfgrass.

Weed Control

Because there are no effective selective herbicides to control them, warm-season grass weeds mixed with warm-season grass lawns are more challenging to eradicate. Pesticides are harmful to the stems and leaves of the winter warm-season lawn grass, but not after they have died. At this time, non-selective herbicides can be applied to kill these weeds, so that the spring rejuvenation of the warm-season turfgrass can not be affected in any way.

Winter Management of the Lawn - Negative Factors That Can Occur in Winter

Winter Management of Cold-season Lawns

The soil temperature of turfgrass in the cold season is greater than 5. Photosynthesis can still occur and the underground root system can still expand, despite the fact that the aboveground leaves are no longer growing. Cold-season lawns benefit greatly from a lengthy period of greenness, but if winter maintenance is neglected, the leaves will also dry out and turn yellow. The winter months therefore require effective and focused management.

Fertilize

when the soil temperature falls to 8 C. The stem and leaf portions of lawn grass have essentially stopped growing below 8 C, but they can still perform photosynthesis, store energy, and withstand the effects of the cold in the winter. In addition to extending the winter green period of the lawn and speeding up spring rejuvenation, late autumn fertilization can encourage the development of underground roots, strengthen turfgrass resistance, and ensure that turfgrass will overwinter safely.

Watering

The cold season lawn needs a lot of water in the winter to maintain its normal physiological activities, but the water demand is higher than that of the warm season lawn, so proper watering in the dry winter can also promote the enhancement of the resistance of the lawn grass, so that the green period of the lawn grass is extended and the ornamental nature of winter is enhanced.
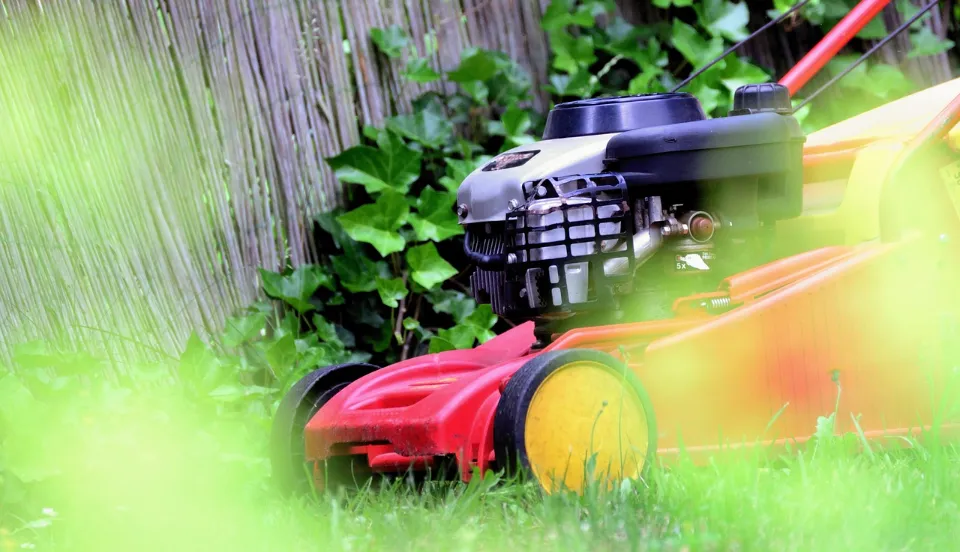
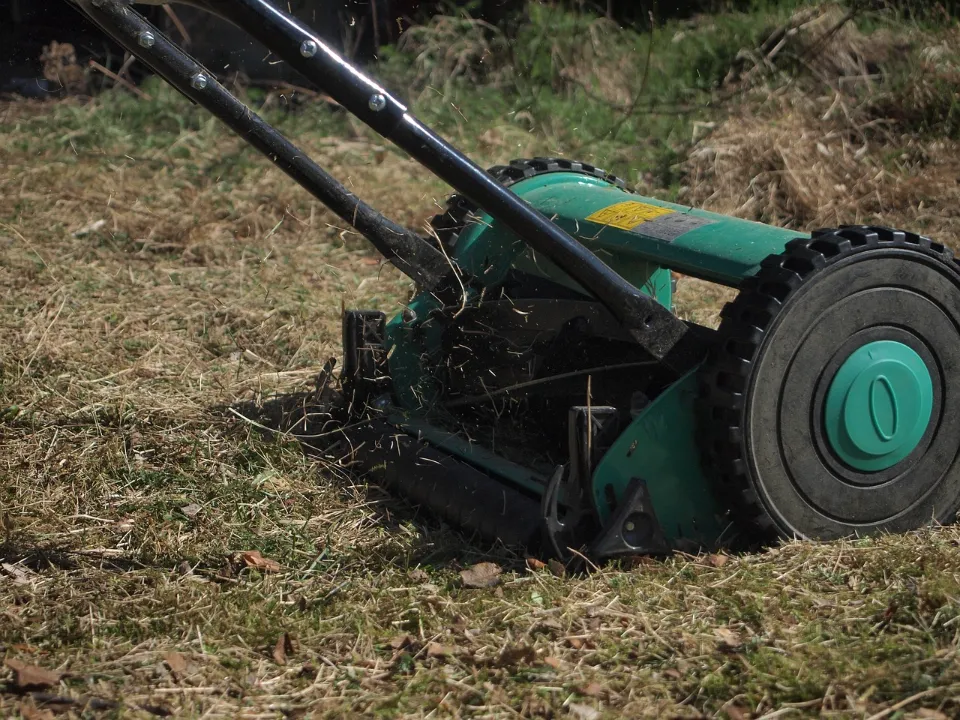
Winter Management of the Lawn - Negative Factors That Can Occur in Winter

Trim

For the particularly cold north, the cold-season lawn grass’s leaves gradually turn yellow from top to bottom in the winter. By gradually lowering the pruning height, you can remove the yellowish part and extend the lawn grass’s period of greenness. A low-trimmed lawn will also turn green earlier the following year.

Protection During Frost

Once it reaches zero degrees. The lawn will suffer significant damage if machinery or a person walks on it or steps on the stems and leaves because they will freeze and become hardened below c. Because of this, the lawn must be specially protected by standing cards during the frost period, and it can only be used once the sun rises and the frost has been lifted. This is crucial for the winter maintenance and management of the sports field lawn.

In addition, there will be some other phenomena in winter lawns, which need to be managed accordingly according to different situations, and strive to extend the green period of winter lawn grass and the greening period of spring lawn grass can be advanced.

Read more ways to care for your beautiful garden on Home Services Offers

How to Fertilize Your Lawn – What Should You Do for Your Lawn?

In order to achieve a virtuous cycle of “good lawn, good soil”, so lawn fertilization is a particularly important part, on the one hand, to supplement the need for mineral nutrients such as nitrogen on the lawn, on the other hand, it also focuses on fertilizing the soil, which is another important measure to obtain high-quality longevity lawn.

What is Lawn Fertilizer

The three chemicals nitrogen, phosphorous, and potassium are what make up lawn fertilizer. While phosphorous improves root growth and potassium increases your lawn’s resistance to disease and drought, nitrogen helps your grass grow green and vibrant.

How to Fertilize Your Lawn – What Should You Do for Your Lawn?

Nutrients and Deficiencies Required by Turfgrass

Green plants require three nutrients to survive: carbon, hydrogen, and oxygen. In addition, they require the other 14 essential elements, including nitrogen, Sulfur, potassium, calcium, magnesium, sulfur, manganese, boron, copper, zinc, iron, molybdenum, chlorine, nickel, and others, which must be taken from the soil or supplemented by fertilization. Without any of these 17 elements, plants cannot grow and develop normally and complete their life history; No element can be replaced by another element; Again, the effect is immediate.

The International Society of Plant Nutrition therefore acknowledges it as a necessary nutrient. Countless elements, including carbon, hydrogen, oxygen, nitrogen, potassium, sulfur, calcium, magnesium, and other nine kinds, make up less than 0.01% of the dry matter in a plant’s body. The remaining elements are trace elements. In addition, there are “beneficial elements” silicon, cobalt, aluminum, selenium, sodium, etc. When soil is acquired, deficiencies in nitrogen, Sulfur, and potassium, collectively known as the “three elements of fertilizer,” are frequently felt. In general, only in special soils and environments do other nutrients need to be supplemented.

Contrasted with crops and even pasture, lawns’ nutrient needs are quite typical. First, the demand for nitrogen is particularly high; second, the demand for potassium is unusual; third, the demand for Sulfur is relatively low; and fourth, other elements also call for comprehensiveness. Therefore, nitrogen, potassium, and Sulfur should be the foundation of fertilization, with other elements being added with care. The harvesting of elegant landscapes and long-lasting, high-quality lawns can be compared in this way.

How to Fertilize Your Lawn – What Should You Do for Your Lawn?

Fertilizer Selection

The nutrient content of various fertilizers, the nutrient salt index per unit of plant, the application rate of various fertilizers, the potential for burning lawn leaves, and the physiology of fertilizers should all be considered when choosing and applying fertilizers. The nutrient salt index per unit of urea formaldehyde, organic nitrogen fertilizer, superphosphate, heavy superphosphate, potassium sulfate and other fertilizers was low (≤1.0), and the possibility of burned leaves was small. Instead, because the salt indexes of sodium nitrate, ammonium nitrate, ammonium sulfate, ammonium phosphate, potassium nitrate, and other salts are higher (≥2.5), there is a greater risk of burning leaves when spreading or spraying these fertilizers.

Additionally, the leaves may be burned by intermediaries such as urea, diammonium phosphate, potassium chloride, and others (1.0–2.5), so care should be taken to apply them uniformly and in the right quantity. In addition, according to the physiology of fertilizers, physiological alkaline fertilizer plants such as ammonium nitrate are absorbed by Na+ and Ca2+ plasma; After absorption by physiological acidic fertilizer plants such as ammonium sulfate, S042-, Cl- plasma remains, which can affect soil pH, and attention should be paid to avoid deepening the acidification or alkalinization of the soil in the application; It is used to improve soil pH.

How to Fertilize Your Lawn – What Should You Do for Your Lawn?

How to Choose the Right Fertilizer

There is a simple method to determine which bag of fertilizer is best for your lawn, but the chemical ratios can vary depending on your fertilizing circumstances. Three numbers will be prominently displayed on fertilizer bags or packaging. These numbers tell you how much of each chemical are in the bag. The first number indicates the amount of nitrogen, the second the amount of phosphorus, and the third the amount of potassium. Multiplying the percentage by the bag’s size (weight) will reveal how much of each is contained in the bag. (Example: a 50 lb. bag of 10-10-10 contains 5 pounds each of nitrogen, phosphorus and potassium.) To make sure you’re using the right amount of each chemical for the needs of your lawn, read the fertilizer bag carefully.

When to Fertilize Cool-Season Grasses

Apply winter fertilizer to your lawn in September, unless you live in the southern third of the United States. The reason for this is that the northern two-thirds of the United States. is home to lawns with cool-season grasses or “transition” lawns with both cool-season and warm-season grasses. It is a waste of money to apply a lot of fertilizer to your cool-season lawn in July because during the height of the summer, the grass roots are merely waiting for the temperature to drop so they can spread out more. Your cool-season lawn should only require a small amount of fertilizer in the spring in addition to the fertilizer you apply in September.

How to Apply Fertilizer to Cool-Season Lawns

A dry lawn should not be fertilized. Wait until the day after a rain, when the soil is moist, instead. In order to prevent your fertilizer from being washed away before it can be absorbed into the soil, it is also best to time your application so that there is at least a few days before the next rain. Calculate how much fertilizer you’ll need for your lawn. To spread the fertilizer as evenly as possible, walk your lawn in a regular pattern while using a spreader or broadcaster.

How to Fertilize Your Lawn – What Should You Do for Your Lawn?

Fertilization Technical Points

1. Focus on nitrogen fertilizer, with potassium, Sulfur, and other expensive fertilizers, in accordance with the characteristics of lawn fertilizer demand. Low-managed grass that receives at least 0.5 kg/100 m2 of nitrogen annually (equivalent to 1.2 kg/100 m2 of urea); the height can reach 5 to 7.5 kg/100 m2 (11.1 to 16.7 kg/100 m2 of urea) or more. The nitrogen:potassium:Sulfur ratio is typically 2:1:1.5 (half of nitrogen is slow-acting nitrogen), and the demands for potassium and Sulfur in lawns are 1/2, 1/3, and 1/5, 1/10 of nitrogen, respectively. This is because different nutrient elements behave differently when they are leached and fixed. In the real world, it can be changed as necessary depending on the state and time of the lawn. The lawn’s leaves are a thick, soft green color, indicating adequate nitrogen fertilizer, and they are straight and elastic, indicating a high potassium and Sulfur content. Rejuvenation top dressing can increase the nitrogen fertilizer content; potassium and Sulfur can be added in greater quantities to improve the lawn’s ability to withstand stress in the winter and summer.

How to Fertilize Your Lawn – What Should You Do for Your Lawn?

2. To level the lawn floor, apply organic fertilizer at least once a year along with cultivation soil. If there is a special need, it may happen twice a year. About half of the annual nitrogen application amount comes from the rate at which organic fertilizer is applied.

3. Top dressing is applied based on the use of cultivated soil and organic fertilizer. Top dressing should consider not only the grass seed but also how the lawn is used, how vigorously it regenerates, and how much self-renewal it exhibits.

Green lawns typically receive a top dressing twice a year: once after rejuvenation and once in the fall, depending on the weather and the lawn’s nitrogen nutrition status. It should be applied quickly after the temperature has stabilized and is conducive to the growth of the lawn, and the nitrogen level of the lawn allows. Borrowing a leaf color color card will allow you to determine the lawn’s nitrogen level. In practical work, the “1 and 3 leaf colorimetric method” is more practical, especially in diagnosing the nitrogen level of grass.

How to Fertilize Your Lawn – What Should You Do for Your Lawn?

With a sprinkler irrigation system, the fertilizer can be evenly and labor-savingly applied to the lawn by first dissolving it in a small amount of water, filtering out the slag before adding it to the pool. If there is no sprinkler irrigation system should be spread, spread should pay attention to even, wait for the dew to dry and operate after operation, so as not to burn the lawn and ensure that the grass color and grass height is consistent. The best approach is to divide the fertilizer into two portions, one facing north to south and one facing east to west. Choose to water before the rain or after sprinkling, so that the fertilizer can dissolve and seep into the soil. The best time to water should be chosen along with a good fertilizer.

Read more fertilization technical points on Home Services Offers

Hair Loss in Black Women: Tips from An Expert

Nearly 50% of black women report having hair loss in some form. However, few doctors are knowledgeable about black hairstyling techniques, leaving many women to sort through useless or even harmful advice on their own.

For women to protect their damaged hair and recognize common warning signs of hair loss, dermatologist Crystal Aguh, one of only a few dermatologists in the nation who specializes in hair loss, offers the following advice.

What Steps Can I Take to Prevent Or Slow Hair Loss?

Unfortunately, some types of hair loss are inherited, and there isn’t much that can be done to stop them. Alopecia areata and female pattern hair loss are two genetic forms of hair loss.

However, poor diet and stress can also cause other types of hair loss, such as generalized hair shedding. Try to maintain a healthy diet, and find ways to look after your mental well-being.

Maintaining your regular checkup schedule will be of additional benefit. Anemia, low levels of vitamin D and abnormal thyroid hormones can all affect the health of your hair. If these conditions are a factor in your hair loss, your primary care physician can identify it with a few simple blood tests.

Black women in particular are prone to traction alopecia, a type of hair loss brought on by heat, chemicals, and tight hairstyles like some braids, dreadlocks, extensions, and weaves that pull at the hair root.

Hair Loss in Black Women: Tips from An Expert

What Can I Do About Traction Alopecia?

To protect your hair from traction alopecia and prevent further damage:

  • Ask your stylist to make dreadlocks or braids that are looser.

  • If you have braids, remove them after three months.

  • Remove any weaves or hair extensions you are wearing after eight weeks.

  • Make sure a professional applied the relaxing or coloring if you have that type of hair treatment. Avoid all chemical treatments entirely if you continue to experience hair breakage or shedding.

  • Reduce your use of heat styling tools like hair dryers, flat irons, and curling irons, or stop using them altogether. These damage the hair and may result in severe hair loss.

Hair Loss in Black Women: Tips from An Expert

What Are the Warning Signs of Hair Loss?

It can be challenging to determine if you’re losing hair, particularly if it happens gradually.

Instead, you may notice that your ponytails don’t feel as thick, or that your scalp is more visible.

If you’re unsure, ask your stylist (preferably someone who has known you for some time) if they have noticed any differences. This is particularly crucial for women who are losing their hair in areas that are challenging to see without assistance, like the top of the scalp.

Schedule a consultation with a dermatologist if you or your stylist suspect hair loss. Generally speaking, the more hair you can save the quicker you act.

For more signs & treatments of hair loss, check Home Services Offers

Everything You Need to Know About Hair Loss

Alopecia is a condition where people lose hair. Children can also experience it, even though older adults tend to experience it more frequently.

The American Academy of Dermatology (AAD) estimates that you typically lose between 50 and 100 hairs per day. With about 100,000 hairs on your head, that small loss isn’t noticeable. Usually, new hair grows in to replace the lost hair, but this doesn’t always happen.

Hair damaged may start suddenly or develop gradually over time. It could either be short-term or long-term, depending on the underlying cause.

Are you attempting to determine whether you are truly losing hair or merely experiencing normal shedding? Unsure if it’s time to see a doctor? Continue reading for more details on hair loss and how to treat it.

Everything You Need to Know About Hair Loss

Hair Loss Symptoms

More hair loss than usual is the primary sign of alopecia, but this sign can be trickier to spot than you might think.

The following symptoms can provide some clues:

  • Widening part. If you have a part in your hair, you might start to notice that it is getting wider over time. This could indicate hair thinning.

  • Receding hairline. The same goes if you notice that your hairline appears higher than usual; this could indicate thinning hair.

  • Loose hair. Check your brush or comb after using it. Are there more hairs being collected than usual? If that is the case, hair loss may be indicated.

  • Bald patches. These can come in different sizes and develop over time.

  • Clogged drains. You might discover that hair has clogged the drains in your shower or sink.

  • Pain or itching. You may also feel pain or itching on your scalp if you have a skin condition that is the root of your hair loss.

Everything You Need to Know About Hair Loss

What Causes Hair Loss?

There are several types of hair loss, some are common and some are rarer, and each with different underlying causes.

Depending on the type of hair loss, it can be the result of genetics, internal causes, or external causes. Here’s a look at a few different types of hair loss:

Everything You Need to Know About Hair Loss

Androgenic Alopecia

Androgenic alopecia refers to hereditary hair loss, like male pattern baldness or female pattern baldness, and is also known as “pattern alopecia” because it can happen to both males and females.

It’s also the most common cause of hair loss, affecting up to 50% of people.

Androgenic alopecia-related hair loss typically occurs gradually. Despite the fact that some people may start losing their hair as early as puberty, others may not start noticing symptoms until their middle years.

Female pattern baldness frequently manifests as scalp thinning all over and may appear as widening or thinning around the part. Although it usually starts after the age of 65, it can start earlier in life for some females.

Male pattern baldness typically involves progressive hair loss above the temples and thinning at the crown of the head, creating an “M” shape.

Learn more about hereditary hair loss.

Everything You Need to Know About Hair Loss

Alopecia Areata

Your immune system attacks the hair follicles as a result of the autoimmune disease alopecia areata, which can cause small to large bald patches. It might result in total hair loss in some circumstances.

Alopecia areata patients sometimes also experience hair loss in their brows, eyelashes, or on other body parts in addition to scalp hair loss.

Get more information on alopecia areata.

Anagen Effluvium

Rapid hair loss is a symptom of anagen effluvium. This usually happens because of radiation treatment or chemotherapy.

After the treatment is finished, hair will typically grow back.

Everything You Need to Know About Hair Loss

Telogen Effluvium

A traumatic event, a prolonged period of extreme stress, or a serious illness are examples of emotional or physical shock that can cause telogen effluvium, a type of sudden hair loss.

It can also happen because of hormonal changes, like those that happen in:

  • Childbirth

  • Postpartum

  • Menopause

  • Polycystic Ovary Syndrome (PCOS)

Other potential causes of telogen effluvium include:

  • Malnutrition including vitamin or mineral deficiency

  • Certain endocrine disorders

  • Starting or stopping hormonal birth control

  • Post surgery as a result of the anesthesia

  • Acute illnesses or severe infections like COVID-19

Several types of medications can also cause it, including:

  • Anticoagulants

  • Anticonvulsants

  • Oral retinoids

  • Beta-blockers

  • Thyroid medications

When the underlying cause is treated, this type of hair loss frequently returns on its own.

Everything You Need to Know About Hair Loss

Tinea Capitis

A fungal infection that can affect the scalp and hair shaft is tinea capitis, also known as ringworm of the scalp. Small, scaly, itchy bald patches are the result. If not treated right away, the patch or patches will enlarge and fill with pus over time.

These patches, sometimes called a kerion, can cause scarring as well.

Other symptoms include:

  • Brittle hair that breaks easily

  • Scalp tenderness

  • Scaly patches of skin that look grey or red

It’s treatable with antifungal medication.

Everything You Need to Know About Hair Loss

Traction Alopecia

Too much pressure and tension on the hair—often from wearing it in tight styles like braids, ponytails, or buns—leads to traction alopecia.

How is Hair Loss Diagnosed?

It’s best to make an appointment with a medical professional if you notice any changes in your hair because so many things can result in hair loss.

To help identify the causes, they’ll probably use a combination of your health history—including any recent illnesses, surgeries, life stressors, and family history—and a physical exam.

They might take a biopsy of the skin on your scalp if they suspect an autoimmune or skin condition. This involves carefully removing several small sections of skin for laboratory testing.

It’s critical to remember that the process of hair growth is intricate, and that diagnosing the root of your hair loss may require a number of tests. If the root causes are initially incredibly unclear, a biopsy may also be performed.

In order to look for signs of an underlying condition or nutrient deficiencies, they may also order blood tests.

Everything You Need to Know About Hair Loss

What Are the Treatment Options for Hair Loss?

Numerous treatments are available for hair loss, but the one that will work best for you will depend on the root of the problem.

Topical or oral medications are typically used as the first line of treatment for the most prevalent types of hair loss.

The majority of over-the-counter (OTC) medications come in the form of topical creams, gels, solutions, foams, or solutions that are applied directly to the scalp. A component called minoxidil is found in the most popular products.

In particular for male pattern baldness, prescription drugs like finasteride (Propecia) may help stop further androgenetic hair loss. You take this medication daily to slow hair loss, though some experience new hair growth when taking finasteride.

If hair loss appears to be related to an autoimmune condition, your doctor may advise anti-inflammatory drugs, such as corticosteroids.

A few types of laser therapy, microneedling with PRP, and other oral medications are among the more recent treatments that are also being investigated. But more research will be required because many of these treatments are still in the early stages of testing.

Everything You Need to Know About Hair Loss

Hair Transplant Surgery

Moving tiny skin plugs with a few hairs each to bald areas of your scalp is the procedure known as hair transplant surgery.

Given that inherited baldness usually affects the top of the head, this is effective for those who have it. You might require several procedures over time if your hair loss is progressive in some cases.

It’s important to note that this approach is unlikely to be beneficial or helpful for people who have alopecias scarring.

Everything You Need to Know About Hair Loss

How Can I Prevent Hair Loss?

There are a few things you can do to minimize hair loss:

  • Hairstyles should be free-flowing. Keep your braids, buns, or ponytails loose if you frequently wear your hair in these styles to prevent undue stress on your hair.

  • Don’t touch your hair. Avoid pulling, twisting, or rubbing your hair as much as you can.

  • Pat hair dry. After washing, use a towel to gently pat your hair dry. Avoid rubbing your hair with the towel or twisting it within the towel.

  • Aim for a balanced diet that is nutrient-rich. Make an effort to include a lot of iron and protein in your meals and snacks.

Frequently, hair loss is caused by styling supplies and equipment. Examples of products or tools that can affect hair loss include:

  • Blow dryers

  • Heated combs

  • Hair straighteners

  • Coloring products

  • Bleaching agents

  • Perms

  • Relaxers

Use the lowest heat settings and only style your hair with heated tools when it is completely dry.

Use a mild baby shampoo to wash your hair if you’re experiencing hair loss right now. Unless you have extremely oily hair, consider washing your hair only every other day or less.

Everything You Need to Know About Hair Loss

When to See a Doctor About Hair Loss

For any unexplained hair loss, it is best to consult a medical expert who can determine the underlying cause and the most appropriate course of action.

During your appointment, be sure to mention any other unusual symptoms you’ve noticed, including:

  • Fatigue

  • Unexplained weight loss

  • Fever

  • Changes in bowel movements

  • Rashes or other skin changes on your scalp or body

  • Recent surgeries or medical procedures

  • Changes to your diet and nutrition

  • Any new immunizations or medications

It will also be helpful if you can provide details about how quickly the hair loss started and whether there is any balding in your family.

Find more hair loss information on Home Services Offers

What Are the Benefits of Hair Masks?

You might think you have the moisture-locking issue covered because you condition your hair once a week or even twice a week. But what are the advantages of hair masks, what do they do, and why (and how frequently) should you use one? You already know the questions! You can find the solutions here. Let’s get started.

What is a Hair Mask?

A hair mask functions as a conditioner with enhanced benefits. It functions similarly to a conditioner but has extra advantages that make it more potent and nourishing.

Hair masks hydrate parched tresses and aid in preserving the color of colored hair. And the latter is not just synonymous better hair, but it is also essential to keep frizz at bay, as explained in our frizz survival guide.

Hair masks frequently contain extracts (from plants), special oils (like almond, Abyssinian, argan, rose, etc.), types of butter (like shea and cocoa), and other nourishing ingredients. These specially formulated ingredients are designed to sink into the hair and provide dramatic benefits after just one use.

What Are the Benefits of Hair Masks?

Why Should I Use a Hair Mask?

Hair masks can produce impressive results in the area of shine and strength because they add extra nourishment (in addition to your favorite conditioner). Hair masks can reduce frizz and repair dryness. Additionally, they can stop further harm.

What Are the Benefits of Hair Masks?

As previously mentioned, hair masks give hair that is smooth and shiny. As split ends can only be treated with a haircut, damage can be covered up but not actually repaired. However, masks do make your hair thicker and stronger and stop damage in its tracks, preventing further breakage. All seasons of the year, but winter in particular, require deep conditioning. Hair masks hydrate parched tresses and support the preservation of colored hair’s color. However, their ability to act as a mini-home spa and make your hair look gorgeous is their best perk.

What Are the Benefits of Hair Masks?

How Often Should I Use a Hair Mask?

Hair masks can be applied every day, every week, every month, or as often as necessary. There are various kinds of hair masks, some of which can be worn while bathing or showering and others of which can be worn while dozing off. But be careful not to sleep with a hair mask that isn’t made for that purpose. However, you don’t need an overnight mask to enjoy the advantages. For a deeply nourishing treatment for your brittle hair, take a look at our Protein Shake hair mask.

What Are the Benefits of Hair Masks?

How Do I Use a Hair Mask?

First, shampoo and rinse your hair. Rinse and repeat the washing process. Hair should ideally be shampooed twice. Cleanse properly after first removing any debris, but don’t use too much cleaning solution. Make sure to thoroughly rinse your hair.

After that, condition as normal. Just two minutes are required with the conditioner on. Then rinse.

Apply your hair mask, then give it three to five minutes to begin working. If you want additional benefits or have extremely dry hair, you can leave your mask on for up to fifteen to twenty minutes. As a tip, you can use this extra wait-time to wash your face, scrub your body, shave your legs, apply a face mask, etc; do whatever you need to do!

Rinse your hair, being careful to rinse out any extra product. Before using a hairdryer, towel-dry your hair, then add a little Abyssinian oil to the ends.

Your hair should now look fantastic.

What Are the Benefits of Hair Masks?

What Type of Hair Mask Should I Buy?

The market is flooded with masks, and there are even recipes for making masks at home. Make sure to look for a mask with high-quality ingredients that contain natural oils and butters if you prefer to eat your avocados, egg whites, bananas, and honey rather than apply them to your hair. To ensure you’re getting a higher proportion of high-quality ingredients, as with any product, you should search for one in the middle of the price range.

Check more hair mask products on Home Services Offers

What to Know About Microwave Ovens and Your Health

For many years, microwave ovens have been a standard in homes, but concerns about microwave radiation have persisted. Microwaves are used to heat up your food and make quick meals.

While there is radiation from microwave ovens, it is not hazardous to your food or health.

What Are Microwave Ovens?

Due to their capacity for quick heating, microwave ovens differ from conventional and toaster ovens. Within the oven, microwave radiation heats the outside layer of food, and the inside is cooked from the conduction of heat from the outside. Because of their speed and affordability, microwave ovens working are more prevalent than toaster ovens in homes.

What to Know About Microwave Ovens and Your Health

How to Use a Microwave Oven

Food is heated directly in microwave ovens. They are relatively simple to use. You put your food in the device, press how long you want it to cook, and make sure your food is completely heated. There are many microwave oven uses. They are a type of rapid cooker used for cooking leftovers, frozen meals, and other things. They cook food faster than conventional ovens and heat the food only instead of the whole oven compartment.

What to Know About Microwave Ovens and Your Health

How Does a Microwave Work?

Inside microwave ovens is a magnetron, an electron tube that generates microwaves. The food absorbs the microwaves after they are reflected by the metal of the oven’s interior. The heat needed to cook food is created by the vibration of water molecules caused by microwaves. Vegetables, for example, can be cooked quickly despite having a high water content.

Though your food absorbs microwave energy, it doesn’t make it “radioactive” or “contaminated”. Non-ionizing radiation, used in microwaves, moves molecules’ atoms but doesn’t remove their electrons. Microwave radiation can’t alter the chemical makeup of your food. This means that using your microwave and eating food that it has cooked are both safe. Making quick meals is facilitated by the microwave oven’s variety of uses.

What to Know About Microwave Ovens and Your Health

What is Microwave Oven Radiation?

Microwaves are a type of “electromagnetic” radiation. Consequently, both magnetic and electrical energy waves are propagating through space at the same time. Microwaves are different from radio waves and X-rays. The fact that X-rays are ionizing radiation means that they have the power to change molecules and atoms as well as harm cells. Body damage from ionizing radiation is possible. However, microwaves do not emit any harmful non-ionizing radiation.

There is no concrete evidence to link microwave oven radiation to cancer, nor is there any evidence that it does. Your food is not radioactive due to microwave radiation. You are merely heating your food.

Microwaves only emit non-ionizing radiation when they are turned on and cooking. The food absorbs all the microwaves generated inside your oven. The design of microwaves prevents electromagnetic radiation from escaping the oven. The U.S. Food and Drug Administration (FDA) does advise inspecting your microwave to see if it has been damaged or altered. Additionally, they advise against standing in front of or right up against your microwave while it is on.

What to Know About Microwave Ovens and Your Health

Are Microwave Ovens Safe?

The FDA has a Center for Devices and Radiological Health (CDRH) that enforces performance standards for electronic products to ensure radiation emissions aren’t a hazard to the public. The total number of safely leaked microwaves over a microwave oven’s lifetime is capped by a federal standard. This is far less than any amount that could endanger you.

Plus, the further away you are from the source of radiation, the less the microwave energy has an effect. A standard interlock system is also built into every oven, which disables it when the door is opened and stops the microwave oven.

The FDA tests microwave ovens in their own lab to evaluate the manufacturer’s radiation testing and does quality control.

Radiation from microwave ovens doesn’t cause cancer, but if you’re exposed to it, it can hurt. In the same way that microwave radiation warms your food, it can also warm body tissue. These burns, however, only happen when you’re exposed to a lot of microwave radiation.

Non-ionizing radiation includes radio waves, visible light, and microwaves. UV light is the only non-ionizing radiation that can cause cancer. Overall, microwaves are safe to use and won’t lead to cancer or any other serious health issues.

You can switch to a newer microwave if you’re concerned that your current one is leaking radiation or is simply too old. Microwave ovens typically last about ten years, so if you’ve had yours longer, it might be time to upgrade. It might be best to leave the room while the microwave cooks if you have an older microwave that you want to keep. This is just to protect you from any potential radiation leakage.

Find more microwave use information on Home Services Offers

How to Use Instant Pot Air Fryer (Guides & Steps)

Are you trying to find a quick and simple way to cook scrumptious and healthier meals without taking too much time in the kitchen? The Instant Pot Air Fryer is a great appliance for home cooks of all levels who want to cook faster and healthier.

This innovative kitchen appliance combines conventional cooking with health-conscious air frying to provide consumers with delicious fried foods that are low in calories, fat, and cholesterol.

You will discover how to use Instant Pot Air Fryer in this blog post, enabling you to quickly prepare delicious meals while maintaining the nutritional quality of your family’s diet.

What is An Instant Pot?

An Instant Pot is an electric countertop multi-cooker that combines the capabilities of a steamer, sauté pan, rice cooker, pressure cooker, and slow cooker into one practical appliance. Pressure cooking with the Instant Pot drastically reduces the amount of time spent in the kitchen preparing meals, while retaining nutrients and locking in flavor.

An Instant Pot Air Fryer is a unique kitchen appliance that combines the power and convenience of an electric pressure cooker with the delicious crunchiness of air frying. For busy families, this all-in-one appliance is a great option because it enables you to prepare your favorite meals more quickly and mess-free.

Benefits of Use Instant Pot Air Fryer:

Given all of its advantages, the Instant Pot Air Fryer is a fantastic addition to any kitchen. Here are some of the reasons why you should consider using an Instant Pot Air Fryer:

• The Instant Pot Air Fryer is perfect for busy families who don’t have time to wait around for dinner because it cooks food up to 70% faster than traditional methods.

• Dishes that are air-fried can be much healthier than those that are deep-fried by omitting unhealthy fats and additives.

• Versatile recipes — The Instant Pot Air Fryer’s pre-programmed settings and temperature control allow you to make a variety of delectable dishes quickly and easily.

• Simple cleanup – The Instant Pot Air Fryer is simple to clean thanks to its non-stick interior, making it a great option for people who don’t have time to spend washing dishes.

• Options for accessories: Some Instant Pot Air Fryer models come with bakeware and crisper trays, enabling you to create even more delectable dishes.

It’s understandable why so many people select an Instant Pot Air Fryer as their preferred kitchen appliance when you combine all these advantages.

What Makes the Instant Pot Air Fryer Unique?

A few essential features that distinguish the Instant Pot Air Fryer from other countertop appliances such as microwave oven. All of the Instant Pot’s features are included, and an air fryer basket is also included for consistently perfectly crispy food. This enables you to produce dishes of restaurant quality without having to slave away in front of your stove for hours on end.

But you may think that air fryers are toxic, in fact, the air fryer is a remarkably adaptable appliance because the basket can be removed and used separately. With the Instant Pot Air Fryer, you can quickly pressure cook and then crisp up your food. Even baking cakes right in the pot or roasting vegetables is an option!

How to Use the Instant Pot Air Fryer?

It is simple and easy to use the Instant Pot Air Fryer for delicious recipes. Depending on what you’re cooking, just pick one of the pre-programmed cooking functions, make the necessary adjustments, and press start. The air fryer basket makes it simple and quick to prepare meals of restaurant quality at home.

Here’s a quick guide on using an Instant Pot air fryer:

1. Prepare the food you intend to cook (for instance. vegetables, chicken, fish, etc.).

2. Put the Instant Pot’s air fryer lid in place and add the air fryer oil.

3. Turn the Instant Pot on and select the “Air Fryer” setting.

4. Your recipe may require adjusting the temperature and time settings, and sometimes you can spray some water on your air fryer.

5. Place the food in the air fryer basket, making sure it is evenly spaced.

6. Close the air fryer lid and start the cooking process.

7. Use the “Keep Warm” or “Cancel” button to stop the cooking process when done.

8. Serve the food after carefully removing the Instant Pot’s basket.

You don’t need to order takeout or wait hours for dinner when you can prepare restaurant-quality food right in your own kitchen with just a few easy steps. The Instant Pot Air Fryer makes cooking at home hassle-free while still producing top-notch results.

First Thing You Need to Do!

It’s important to become familiar with the Instant Pot Air Fryer’s instructions and safety features before you begin using it. Before using, make sure to read the manual in its entirety because it contains all of the instructions you require. Spend some time practicing using the various cooking settings and functions as well so that you are confident using the appliance.

Your Instant Pot Air Fryer will be prepared for use after you complete these steps! Therefore, start cooking right away to take advantage of the mouthwatering meals that this incredible kitchen appliance has to offer. Enjoy restaurant quality dishes without having to leave home or spend hours in front of a stove thanks to an Instant Pot Air Fryer, your meals are just a few steps away!

Safety Precautions When Use Instant Pot Air Fryer

It’s crucial to read and adhere to the instructions carefully before using your Instant Pot Air Fryer. To avoid receiving an electric shock, make sure to keep the air fryer away from water and other wet surfaces. Moreover, for safe transfer of hot food items, always use oven mitts or pot holders. Last but not least, always unplug your Instant Pot Air Fryer before cleaning it. Some people think that air fryers may cause cancer, and you can be conscious of the risks and take precautions to lessen your exposure to dangerous chemicals.

Setting Up the Instant Pot With Air Fryer Lid

In order to use your Instant Pot Air Fryer, you need to attach the air fryer lid. Simply place the Instant Pot’s lid on top of it and press down until it locks in place to do this. You should then see a “Fry” option appear in the display screen with various temperature settings. You can now begin using your Instant Pot Air Fryer!

With all these features combined, an Instant Pot Air Fryer is sure to become your favorite kitchen appliance! Now you don’t have to spend hours slaving over a stovetop to prepare restaurant-quality meals at home, from mouthwatering fried chicken wings to crunchy roasted vegetables. You can enjoy perfectly crisp foods right in your own kitchen with just a few easy steps. So don’t wait, start preparing meals with an Instant Pot Air Fryer right away!

Safety Precautions When Cleaning the Instant Pot Air Fryer

It’s crucial to thoroughly clean your Instant Pot Air Fryer after using it. Make sure to unplug the appliance and give it time to completely cool down before cleaning. Never immerse the air fryer in water or any other liquid as this could result in an electric shock. Instead, use a soft cloth dampened with warm soapy water to wipe down all of its surfaces. Additionally, avoid using scouring pads or abrasive cleaners on the air fryer’s exterior or interior because doing so could harm the appliance. Your Instant Pot Air Fryer will be prepared for use again after you’re finished by simply wiping down any leftover water with a dry cloth.

Making Delicious Meals With Your Instant Pot Air Fryer

Now that your air fryer is all set up and ready to go, it’s time to start cooking some delicious recipes in instant pot air fryer! Put food into the air fryer basket first, such as vegetables, potatoes, or even chicken wings. Choose your preferred cooking setting and temperature on the display screen after you have added the ingredients. Once that’s done, start cooking in your Instant Pot Air Fryer.

Check on your food by opening the lid after a few minutes. Use oven mitts or pot holders to remove it from the appliance if it appears to be ready. Enjoy your delicious meal that you quickly and easily prepared with an Instant Pot Air Fryer! With all of its incredible features combined, you can quickly prepare restaurant-quality meals at home.

Tips Use the Instant Pot Air Fryer:

1. Preheat the air fryer before adding food items to ensure optimum cooking results.

2. To get extra-crisp results, use oil or cooking spray on your food items.

3. To ensure an even distribution of heat and texture throughout the cooking process, shake the basket periodically.

4. To prevent overcooking or burning, watch the food as it cooks.

5. Before putting food in the fridge or freezer to be used later, allow it to cool completely.

6. Clean your Instant Pot Air Fryer frequently to prevent grease and residue buildup that can eventually affect the flavor of your food.

These pointers will help you make the most of your Instant Pot Air Fryer and easily enjoy delicious homemade recipes. If you are interested in more instant pot air fryer products, welcome to visit Home Services Offers Website.